During the cord making part of this module I had thought that it would be interesting to use some of the techniques learned to make cords for espadrilles, spiralling up the leg. As the module progressed, I also thought about adding buttons or beads to the cords. My mind therefore settled on making espadrilles. Much of this module was influenced by holidays I took over the summer in various seaside locations, with much time spent on beaches and many of the findings from beach-combing added into my samples. It was only a small step therefore to decide to create some ‘beach shoes’…shoes which represent the beach rather than being designed to wear on the beach. The spiral theme could be further explored through hand embroidery on the shoes.
As a starting point in designing the shoes I compiled a page of images that represented the colours and textures that I wanted to use for the espadrilles. 
Image 10.1 – sketchbook pages
Image 10.1 shows the colours and textures and images that I wanted to be represented in the espadrilles. I very much liked the faded, weather worn textures of the painted wood in the photos, the pale shades of the shells and the rough textures of the rusted chain and the bits of old rope. I thought about elements of a beach that I might want to use such as pebbles, fish, driftwood, sand, rock pools, sea-smoothed pieces of pottery, frothy water’s edges. Having decided on a general ‘feel’ for the espadrilles I next considered what fabrics to use.
 Image 10.2 – sketchbook pages
Choosing and treating the fabric
I liked the idea of the espadrilles representing someone dipping their toes in the water i.e. the front part being blue like the sea and the back part being the sand. The fabrics needed to be fairly strong and also needed a flat i.e. not shiny, surface. I decided on denim for the fronts and a natural coloured linen for the backs.
I considered various ways of treating the denim to give it the sea-like look that I wanted such as:
- monoprinting with fabric paints
- using bleach to monoprint a pattern
- using bleach for shibori
To get the sea-worn look that I was after I decided to explore with different ways of bleaching the denim.


Image 10.3 and 10.4 – monoprinting with bleach
I tried using thick bleach on glass. Whilst this was successful in lightening the denim, it did not produce any of the subtleties that I wanted i.e. variety in colours. Also, the bleach spread out when the fabric was pressed on to it causing big blobs which weren’t particularly attractive.


Image 10.5 and 10.6 – shibori bleaching
I had liked the effects that I got on a previous module with Shibori dying and decided to see if I could so it in reverse i.e. through bleaching. I tied the denim into tight bunches and immersed it into a bowl of diluted bleach until I could see the colour start to fade. I then washed the fabric and untied it. I was very pleased with the effect achieved. The pattern reminded me of how water looks when the sun is shining onto a rippled surface.


Image 10.7 and 10.8 – shibori bleaching
This time I tied the denim into tight pleats and immersed it into a bowl of diluted bleach until I could see the colour start to fade and then then washed and untied it. This produced a beautiful effect on the denim, quite similar to the edge of waves lapping over each other on the beach.
I decided to use the fabric in image 10.6 as I liked the random nature of the pattern and the greater variety of shades of blue produced.
I had decided that I wanted to create a rock pool on the shoes in some way and decided that I could use reverse appliqué to this effect so that the cut away section looked like the edge of the pool. I selected a rough woven canvas to be the layer beneath the denim as it would give a rough textured frayed edge.
 Image 10.9 – canvas for reverse appliqué layer.
I decided on three layers, the base being denim, then canvas then the top layer the shibori denim.
I wanted the rock pools to have some sort of creature living in them and so designed a fish and a starfish which I created from beads.


Image 10.10 – starfish Image 10.11 Fish and seaweed
I then cut out the fabric for the shoe fronts and sandwiched the layers together with the beaded motifs on the bottom layer. I stitched around the shape of the motif and cut back the top two layers to reveal the beaded motifs.  Image 10.12 – reverse appliqué ‘rock pools’
I then made a design of loose spiral shapes with tailor’s chalk on to the denim and hand stitched it with a variety of blue threads, and then added some lines of wool which I machine couched in place.
 Image 10.13 – machine couching
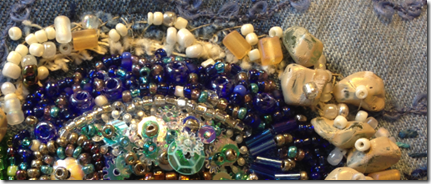
I wanted to make the edges of the beaded motifs look more like the edge of rock pools and so added some beads and stitching to look like rocks and pebbles. I realised at this point that the same effect could have been achieved without reverse appliqué as I had embroidered and beaded all over the exposed layers!


Images 10.14 and 10.15 – beaded rock pool motifs with hand stitched embroidery and couched water design
Next I cut out some cotton fabric that I had monoprinted in an earlier chapter of this module and made a lining for the shoe fronts. I then stitched them with the right sides together and turned them inside out as shown in image 10.16.

Image 10.16 – lined shoe fronts
I wanted to add some ‘froth’ to the edge of the water shapes and so used white seed beads, some of which came over the edge of the show as a fringe.
 Image 10.17 – frothy water beading
The soles
I bought a pair of ready made rope espadrille soles online.
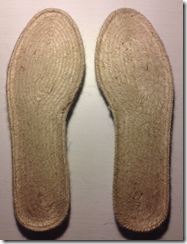 Image 10.18 – espadrille soles
I wanted to decorate the upper surface in a beach-related way. I initially thought of a play on the word sole as in shoe sole and the fish called a Sole. I had a go at Gyataku (the Japanese art of fish rubbing). I came cross an artist doing Gyataku in the Isles of Scilly this summer and was very impressed with the artwork he produced. I bought a Megrim Sole and covered it in acrylic paint. I then pressed a sheet of lense tissue on to the painted fish making sure that the whole surface was covered, then lifted the paper off to reveal a print. Image 10.20 shows the print made which picked up the beautiful scale pattern of the fish.


Image 10.19 Image 10.20
I contemplated doing a print on to cotton lawn fabric to use for the soles but felt that there wasn’t quite enough pattern in the print for it to be clear what it was.
I like the fish idea for the soles and so then decided on a different approach. I used a photo of some mackerel caught by my son on holiday. I created a picture and printed it on to printable cotton.

Image 10.21 – printed image on cotton
I decided it would be fun to have the fish print starting on the left shoe sole and continuing through to the right sole so that the tails were on one foot and the heads on the other.

Image 10.22 – lining the print up ready to cut the sole covers
 Image 10.23 – the covered soles.
I then used Bondaweb to stick the fabric to the soles and tacked around the edges to ensure they held in place.
The back and sides of the shoes
The back and sides of the shoes were to represent the sandy beach. I cut double layers of my linen fabric, interfaced one layer to give it additional firmness and stitched the two pieces together, turning them inside out to create the neat edges required. After pressing them I started decorating them.
First of all I stitched some stranded pieces of yarn on to the look like sea grass (image 10.24).
 Image 10.24
I wanted to add some shell-like pieces to the fabric. I considered trapping some shell fragments under a sheer fabric but didn’t think that this would give me the texture or finish that I wanted. I therefore decided to make some shell like pieces from white Fimo polymer clay – see image 10.25

Image 10.25 – Fimo ‘shells’
When I baked the Fimo I had a happy accident…some of the pieces became discoloured and turned to a pale pink colour. This was the perfect shade for shells and so I was happy to use these pieces. I also made some more and baked them for a shorter time to give me some paler ones too.
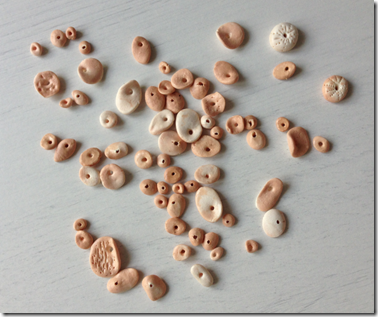 Image 10.26 – baked Fimo ‘shells’
I then added more threads, the Fimo shells and some wooden beads. I used a natural linen thread in Sorbello stitch to add additional texture. The Sorbello stitch created a lovely fishing net type pattern. 
Image 10.27
Finishing touches
I stitched the fronts and backs onto the soles using blanket stitch in a strong thread.
I was now ready to add the cords which would spiral up the legs. I decided to make a stitched cord with cotton string as the core. I chose string because it had the right colour and texture for the look I was trying to achieve. I used some blue and orange threads to decorate the cord (image 10.28)
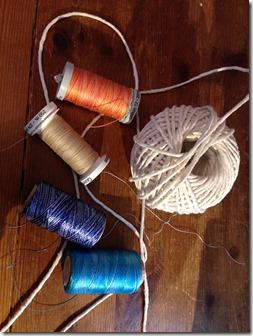
Image 10.28

Image 10.29 – stitched cord
I pulled threads out whilst I was stitching the cord in order to give a loose, messy look and varied the intensity of the stitching in places to give dark and light sections. I then decorated the cord by stitching Fimo shells and beads on in random places and adding shell and bead tassels to the ends of the cords.
 Image 10.30 = beaded cords
The completed shoes are shown in the images below.
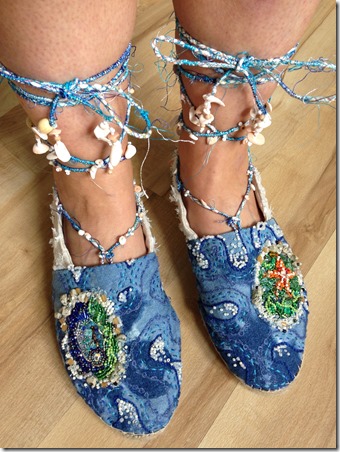
Image 10.31 Image 10.32

Image 10.33

Image 10.34
I am very pleased with how these shoes turned out. In sentimental terms they bring back memories of lots of wonderful days spent on beaches with my family this summer. In design terms I think the patterns and textures have worked better than I expected. The shibori bleaching produced an interesting, varied base for my embroidery and I think gives a realistic representation of water. The Fimo beads added some very natural looking shapes to the backs; better than regular shaped beads would have done. I was also pleased to have moved the spiral theme on slightly from the earlier chapters. The hand embroidery had loose spiral shapes, more abstract than the embroidery I did at the start of the module.
The decorated cords helped to balance the shoes. Before I added them I was concerned about the stark contrast between the blue fronts and the pale backs. Adding the cords really helped to pull the two sections together and unified the design. Finally, the shoes are very comfortable to wear!
 Image 12.4 – Bugle beads attached at one end.
  Image 12.8 – Crevette headpiece – made with spiralling wire ‘salad’