Research for Conservation Theme
As a keen sailor and beach-walker, I was keen to use water, and in particular the world’s oceans as the basis for my final piece. I did some research into the main environmental threats to oceans as a starting point (image 8.1).
Whilst there were numerous topics that I could have chosen, there had been two extremely sad photographs in the national media during the week, both relating to the tragic impact of plastics on ecosystems and wildlife. I therefore chose to focus on plastics in the ocean.
 8.2 – Stork trapped in plastic bag (fortunately the photographer was able to rescue it and remove the bag).
Image 8.3 – Whale that died due to being so full of plastic bags that it could no longer digest real food.
Other tragic images that made me want to chose this topic included this Albatross (image 8.4) which was full of plastic objects that it had eaten.
Image 8.4 – Albatross full of undigested plastics
Image 8.5 – Sea otter rescuing its pup from a plastic bag
I learned that, due to the way the world’s currents work, there are five massive ‘gyres’ in the world which are floating garbage patches. The largest, in the Pacific, is three times the size of France.
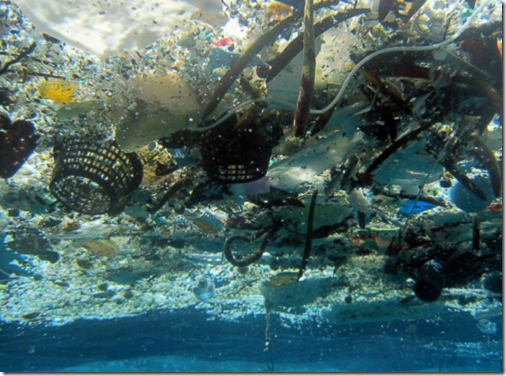 Image 8.7 – the Great Pacific Garbage Patch
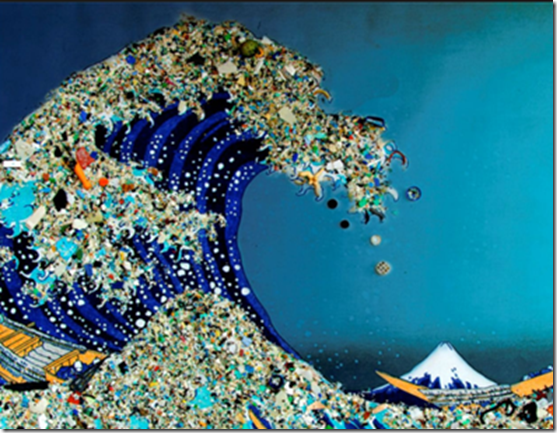
Below, a poignant version of Hokusai’s great wave, this time full of plastic (image 8.8).
Image 8.8
Some of the facts that really hit home for me were:
-
By 2050 there will be more plastic in the ocean than fish
-
Every piece of plastic ever made STILL EXISTS
-
An estimated 90% of sea birds have eaten plastic
-
Americans throw away 2.5 million plastic bottles EVERY HOUR
Knowing that every piece of plastic ever made still exists made me more aware than usual of the amount of plastic in our lives. Despite the fact that I thought I was a discerning shopper, almost every item that I used for making breakfast and lunch on the day I wrote this was in single-use plastic packaging. I have started collecting items which may be used in my final piece.
Whilst this research saddened and frightened me enormously, it also made me want to express these feelings through my wall hanging. I became excited by the possibilities of how I could represent some of these issues.
My starting point on developing design ideas was to create a list of words that related to my theme of plastic pollution in the ocean.
As the list of words shows, my thoughts were about the plastics smothering and overpowering the oceans and sea-life within them.
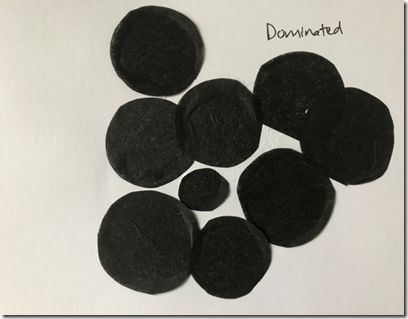
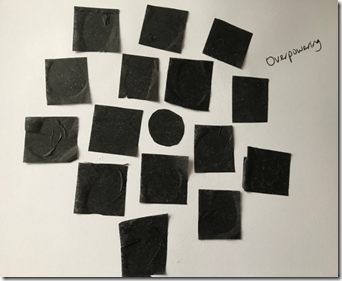
I then used papers to create shapes and compositions that represented some of these words as follows:
Images 8.11 and 8.12 – Dominated
Images 8.13 and 8.14 – Trapped
Images 8.15 and 8.16 – Overpowered
Images 8.18 and 8.19 – Smothered
Images 8.20 and 8.21 – Stifled
The course notes suggested further exercises using papers to help with the design process. After discussion with Sian, we agreed that these would be of limited help as I had already developed some design ideas which I had discussed with Sian at Summer School, and so I worked on the following ideas.
Contrasts: I thought about a number of contrasts to represent the plastics and the delicate organisms.
Man-made / organic
Hard edges of plastics / soft edges of plants and animals
Bright vibrant colours of organisms / white or obscured surfaces of plastics
Shapes: I wanted to use repeated shapes in my design that could represent both the plastic and natural organisms. I decided on circles for a number of reasons:
-
Representing the natural world – like a globe
-
Ripples from water drops make circles
-
Cross section of plastic bottles are circular
-
Circles trap / enclose things inside them
-
Plastics are made from numerous chemicals – circles connected together will look like atoms in an atomic structure. Similarly, they could be atoms of H2O i.e. water.
Image 8.22 – sketchbook page
Materials: for the sea-life organisms I decided to use soluble fabrics and machine embroidery threads to create delicate, brightly coloured pieces. The sea-life pieces would be representational i.e they would represent all living organisms in the sea rather than looking specifically like fish, coral, seaweed etc. I decided to use a range of plastics to explore the best way to represent the smothering plastic pollution.
Structure:
I decided that I wanted the wall hanging to be made up of numerous elements loosely connected together so that they could move and undulate like the ocean.
The smaller elements should each represent either plastic, natural organisms, or both i.e. the natural organisms being smothered by the plastic.
One of my early ideas was to use sections cut from plastic bottles to create rings which would have embroidered pieces trapped within them. I experimented with ways of making these plastic rings. Having cut several rings from plastic bottles I tried different methods of melting them. I wanted them to stay circular, but to loose the look that they had just been cut from a bottle. The most successful method was to put a metal pastry cutter inside a plastic ring and then melt it around the cutter using a hot air gun.
Having created plastic rings in this way, I explored ways of attaching embroidered pieces. I made a few stitched samples using soluble fleece and tried to suspend them within the rings using nylon thread.
Image 8.24 and 8.25
My idea was to connect these rings using nylon thread into a net type structure. However, I decided that this approach didn’t really depict the sense of obscuration or smothering enough. I therefore decided to explore different ideas.
Image 8.26 – sketchbook page
I thought about creating plastic ‘pods’ which could contain some of the ‘organisms’.
Image 8.27 – plastic pod
This had possibilities, but looked too clumsy.
I thought about using plastic milk bottle plastic as it is semi-transparent and so is able to partially obscure things behind it.
Images 8.28 and 8.29
I liked the idea of partially obscuring the stitched pieces and explored that further.
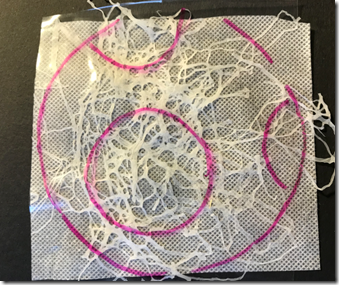
I wanted to investigate methods of combining plastic with stitch so that there could be some kind of graduation in the wall hanging i.e. delicate stitched pieces representing the un-smothered organisms; pieces that combined plastic and stitch i.e. starting to be overpowered and then just plastic pieces where the plastic had dominated the ocean. I decided to use some plastic ‘lace’ and stitch on top of it.
Image 8.30 and 8.31
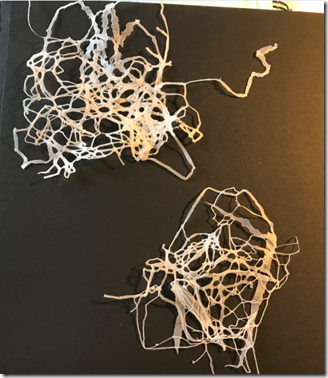
I cut some plastic carrier bags into thin strips and then melted them between greaseproof paper using an iron.
Image 8.32
I tried different types of polythene to find the best material. The white plastic melted better than this see through polythene.
Image 8.33 and 8.34
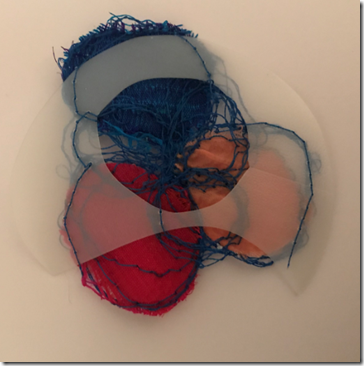
I sandwiched these pieces of plastic lace between Aquabond and some transparent soluble film and machine embroidered through it to create combined plastic/stitch samples.
Image 8.35
I was quite pleased with the way that these turned out: they had a slightly mutated appearance…like nature gone wrong in some way as if it had been corrupted by the plastic.
I then explored ways of combining these pieces with other plastics.
I tried cutting circles from the milk bottle plastic
Images8.37 and 8.38
The milk bottle plastic was easy to stitch through and so I was able to merge the stitched piece with it. When suspended it became slightly transparent and showed the embroidered piece in places which gave the impression that I wanted i.e the natural organism fighting for space through the plastic.
I then tried bonding circles of carrier bag plastic together to see how it could be used.
Image 8.39
I tried cutting circles from it and placing the embroidered pieces behind as if they had been trapped.
Images 8.40 and 8.41
This gave the impression of obscuring the embroidered pieces quite well, but became too solid i.e. it didn’t flow or undulate.
I then used the circles that I had cut from the bonded plastic bags and threaded them on to a batten. I did the same with the embroidered pieces and put them behind the plastic pieces.
Image 8.42 and 8.43
This was starting to get closer to what I was aiming for: a freely hanging structure with plastic sections partly obscuring the embroidered sections.
I then created a number of samples which were embroidered on soluble fabric with no plastic i.e the delicate natural organisms.
 Image 8.44 – embroidered samples before dissolving the fleece
 Image 8.45 – after dissolving the fleece.
I didn’t rinse the pieces too much in order to leave some residue in the thread to give body.
Using various elements from my explorations I decided on the following structure (see image 8.46)
 Image 8.46 – sketchbook page of graduated structure
The top of the wall hanging represents the surface of the ocean in one of the gyres; a surface entirely covered in plastic. The bottom of the hanging represents the beautiful sea life which is free of plastic. From the bottom upwards, the nature samples become more and more enmeshed with plastic until the top layer which is wholly plastic.
The wall hanging comprises five different elements as shown in image 8.47:
-
Plastic circles
-
Plastic circles combined with plastic lace
-
Plastic circles combined with embroidered plastic lace
-
Embroidered plastic lace
-
Embroidered circles
Image 8.47


