Tucks, pleats and gathers
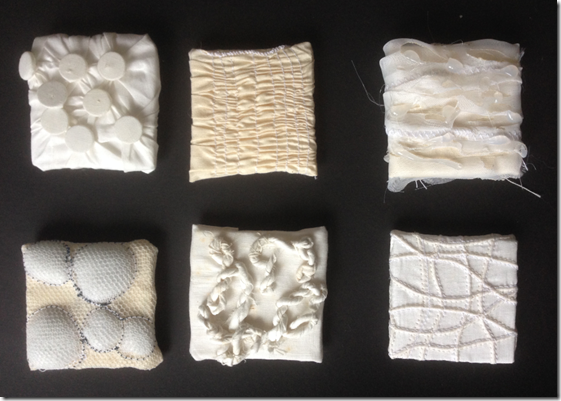
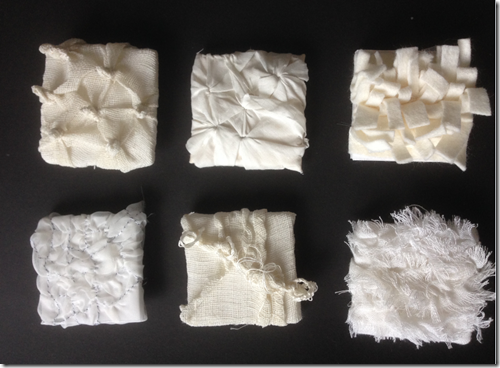
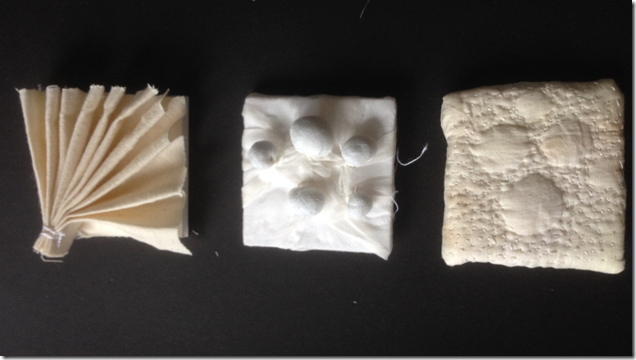
In this chapter I experimented with the different effects that can be achieved using different fabrics and tucks, pleats and gathers.
I started with machine stitching on a long strip of cotton lawn shown below.
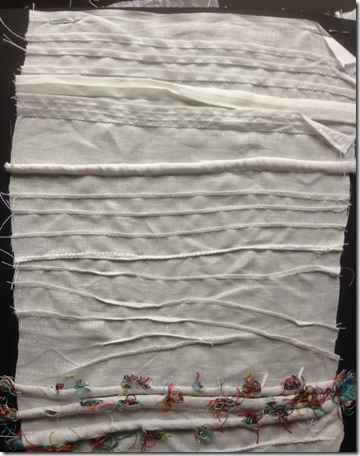
Image 6.1
From the top:
- Basic straight tuck – 3 rows
- Box pleat
- High tuck with 3rows of stitching
- Tuck filled with piping cord
- Narrow pin tucks – 3 rows
- Zig-zag stitched tuck
- Wavy pin tucks
- Filled tucks with bits cut away to reveal the filling of loose silk threads
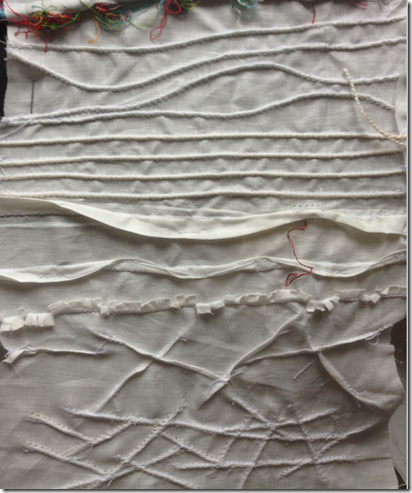 Image 6.2
From top:
- Twin needle tucks, curved – 4 rows
- Twin needle padded tuck using 3rd thread – 4 rows
- Tuck turned side to side – 2 rows
- Straight tuck snipped into fringe
- Short tucks crossing each other
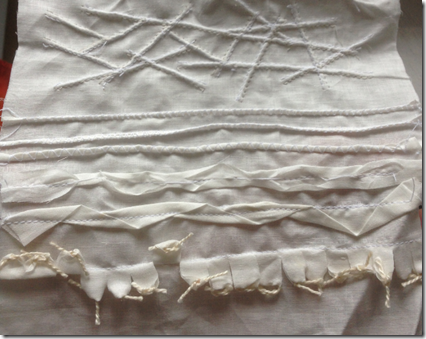
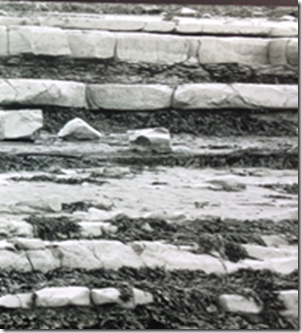
Image 6.3 a and 6.3 b
From top:
When I look back at some of my landscape textures in chapter 1 (shown in 6.3 b above), I can already see how such simple techniques can be applied to represent natural textures.
Next I tried some hand stitched samples using a synthetic transparent fabric.
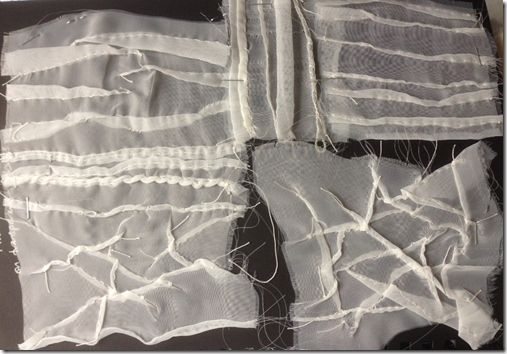 Image 6.4 – Hand stitched tucks on transparent fabric
Clockwise from top left:
I liked the changes in tone created by the folds in the transparent fabric which wasn’t evident in the cotton lawn samples.
Combined tucks
Next I explored combining different methods of creating tucks and pleats. 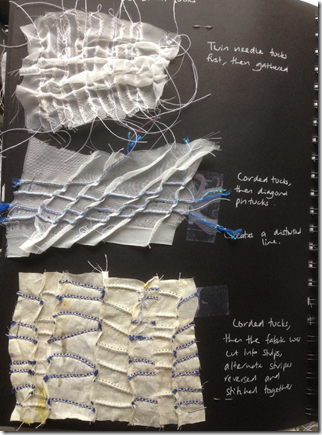 Image 6.5
From top:
-
Transparent fabric; stitched with twin needle rows first, then machine gathered parallel to the tucks
-
Transparent fabric; Corded tucks using twin needle and 3rd thread, then diagonal pin tucks stitched across
-
Cotton lawn, corded tucks using twin needle and 3rd thread, then the fabric was cut into strips, alternate strips were reversed and stitched back together.
I was pleased with all three of these samples. I could see how they could be used to represent the different plates and strata of rocks in my source photographs. Whilst I am not particularly keen on the feel or look of the synthetic fabric, it does work well in terms of having body and holding raised shapes well when gathered (in the top and middle samples in 6.5.)
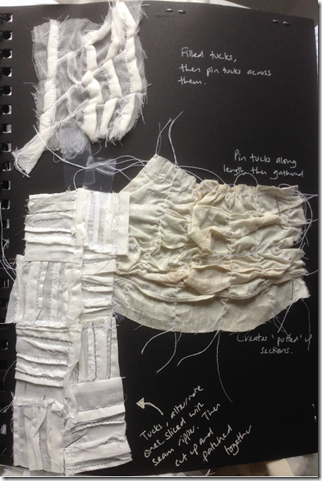 Image 6.6
From the top:
-
Scrim stitched with filled tucks, the pin tucks stitched across them. Whilst the semi-transparent nature of the scrim produced interesting changes in tone where the fabric was doubled, it wasn’t good at holding shapes.
-
Fine linen, pin tucks stitched along the length, then stitch lines in a grid were gathered to create ‘puffed up’ sections, a bit like seersucker. I was very pleased with the texture created using this very simple technique.
-
Cotton lawn stitched with straight tucks, alternate ones were slashed with a seam ripper , then cut into squares and re-stitched together.
Gathers
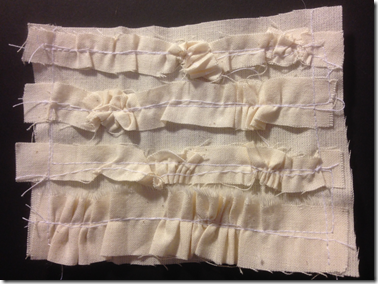
Image 6.7 – Calico, machine stitched strips gathered at irregular intervals
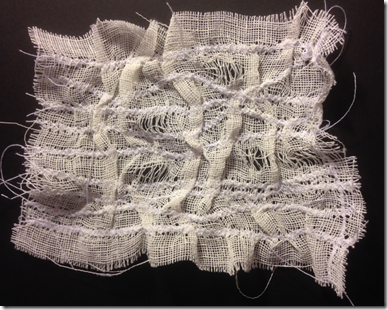
Image 6.8 – coarsely woven synthetic fabric, machine stitched to gather, then zig-zagged over, then some threads withdrawn to make holes. This produced an interestingly textured sample.
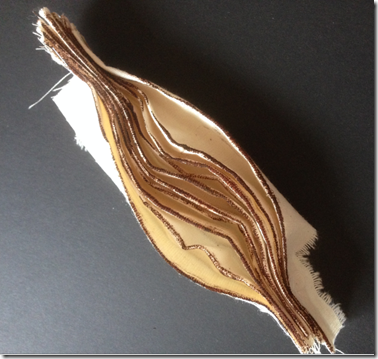
Image 6.9 – hand pleated calico, stitched at each end, then the edges painted. The stiff calico worked well for this quite structural piece and I think the paint on the edge helped to accentuate the form.
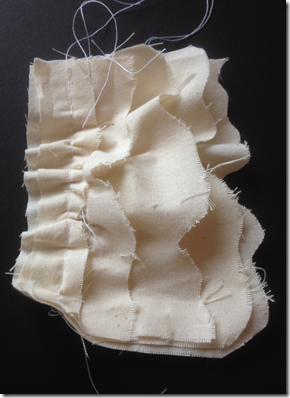
Image 6.10 – calico, 5 tiers of pleats. I gathered underneath each tier to make the tier above raise up.
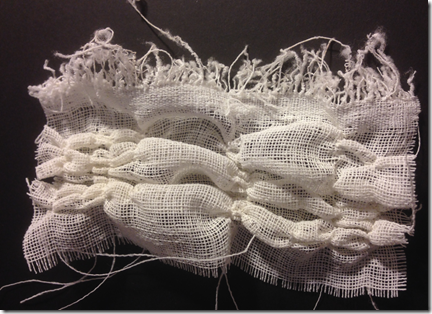
Image 6.11 – coarsely woven synthetic fabric, threads pulled to create gathers. This created some useful pebble shapes.
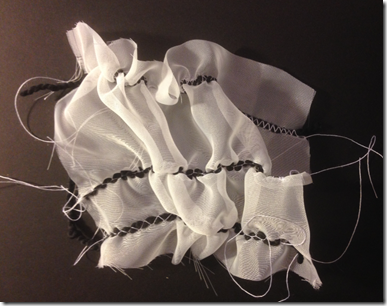
Image 6.12 – cord zig-zagged over to gather

Image 6.13 – transparent fabric strip gathered using wire, then twisted into spiral
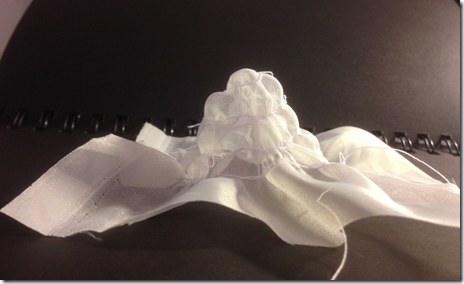
Image 6.14 – transparent fabric, stitched in spiral then gathered to make cone shape – a bit like a jellyfish!
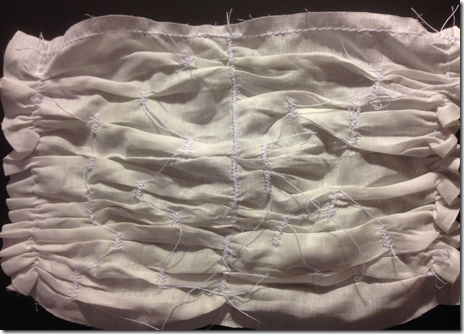
Image 6.15 – cotton lawn, Machine stitched gathers, then stitched over in places. This didn’t work particularly well. The lines and folds created were more subtle than I was aiming for. Using much larger gathering stitches would have produced a more dramatic effect.
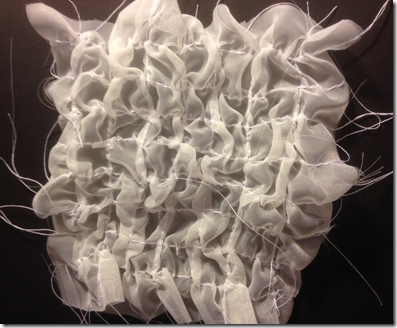
6.16 – transparent fabric machine gathered in grid. I was very pleased with this very lively texture and can imagine using it if I decide to represent some of the seaweed textures in my source photographs as the ‘bubbles’ formed look quite like the pods and sacks in seaweed.
My next few experiments were made using shirring elastic.
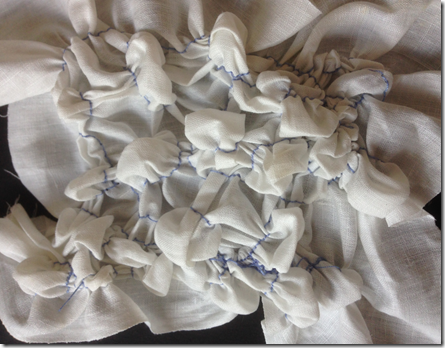

6.17 and 6.18 – Cotton lawn shirring elastic in bobbin, free-embroidery circles, front and back of fabric. I was very pleased with the lovely, inviting tunnels created on the back of this sample.
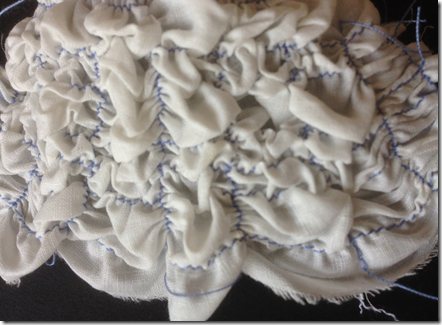
6.19 – Cotton lawn shirring elastic in bobbin, stitched in grid
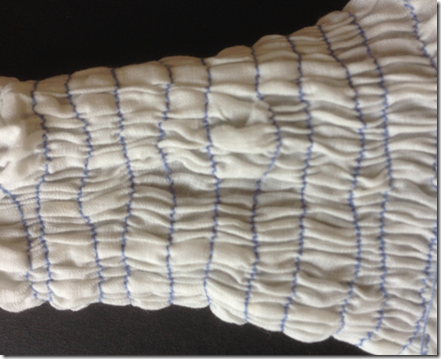
6.20 – Cotton lawn shirring elastic in bobbin, stitched in bands
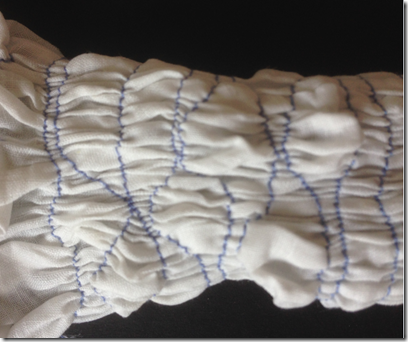
6.21 – Cotton lawn shirring elastic in bobbin, stitched in wavy lines
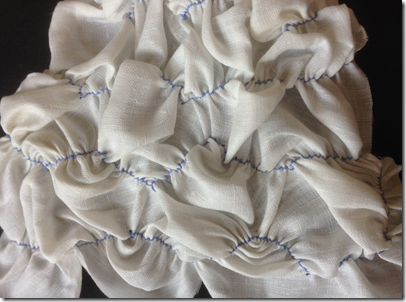
6.22 – Cotton lawn shirring elastic in bobbin, stitched in wide zig-zag lines
This was another really interesting chapter which has given me lots of food for thought for my final assessed piece.
