Book-type structures and stitched edges
I decided to combine chapters 9 and 10 so that I could use the covers of my book structures to try out some stitched edges.
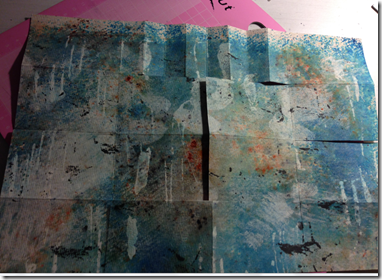
To start I created a batch of papers to use for covers.
Images 10.1 and 10.2
In a previous chapter I had used some old dressmaking patterns for papermaking and liked the texture and so decided to use some again for the inner pages of the books. A single sheet was too thin and so I used some CMC paste to stick two sheets together to make stiffer sheets. This produced a beautifully textured paper which is very strong and yet has a crisp, quite brittle appearance.
Image 10.3 – pasted sheets of dressmaking pattern paper drying
For my first book I created three pamphlets with covers made from cartridge paper and tissue paper for the inner pages. I decided to hold the pamphlets together by making a cord and using it to hold the pages of each pamphlet in place first, and the knotting the three together as shown in image 10.5
Image 10.5
I then decided to decorate the cover by sticking on a piece of my decorated paper and machine stitching a double layer of frayed sari silk around the edge. I then added buttonhole stitch using a linen thread, see images 10.6 and 10.7. It was quite hard to hand stitch through the double layer of card and fabrics on the cover so I pierced the cover first using a thick needle and then stitched through the holes.
Image 10.6
Image 10.7
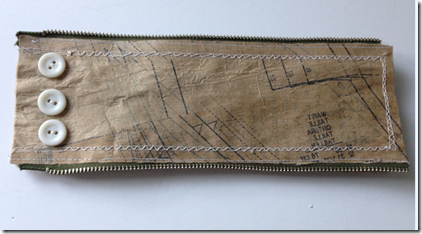
For my next book I decided to solely use the sewing pattern papers that I had prepared. To make them stiff enough to use for the cover I pasted two sheets together (i.e. 4 layers of paper) making quite a stiff card. I used the edge of a steel ruler to tear them into rectangles so that they had slightly rough edges as I thought this would be more attractive than cut edges (image 10.8)
Image 10.8
I thought it would be fun to continue the sewing theme in this book and so used buttons to hold the pages together. I pierced three holes in the pages and stitched through, fastening the stitching through buttons on the front and back covers.
I used a machine embroidery stitch to create a white border and then added sections of metal zip along the upper and lower edge to finish off the ‘sewing’ inspired edges of the book.
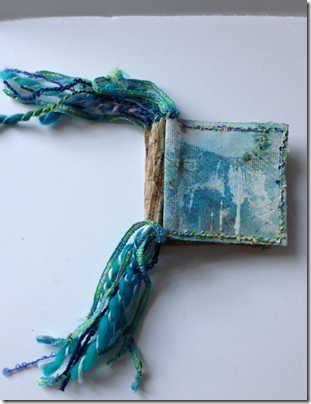
For my next book I decided to combine the dressmaking paper with some of my new decorated papers. I used my ruler again to tear some rectangular pieces which I then folded in half to make squares. I placed a piece of thread, yarn or ribbon into the fold of each page and then pasted them together, trapping the thread (image 10.11) and left them to dry.
I then placed two pages together and knotted the threads at the top and bottom. I repeated this to add all of the pages in.
Image 10.12
Image 10.13
I decorated the edge of the cover by stitching some threads in place in similar colours to the cover (image 10.14).
Image 10.14
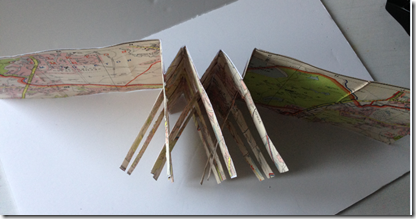
For my next book I decided to try a structure that I had seen in a book (‘Making Handmade Books’ by Alisa Golden) called a Flag Book. I wanted the book to have a theme and decided it would be a map book. I have a large collection of old maps and decided to use one for which had a linen backing as it would give extra strength. As a starting point I created the basic cover shape from some card as shown in image 10.15.
Image 10.15
I then covered the whole structure with sections of map. To create the flag section I photocopied a section and pasted it to the back of the original map i.e. creating a double sided map. From this I cut the flag shapes. I used a hot glue gun to stick these to the folds in the ‘book’ cover as shown in image 10.16.
Image 10.16
This created a really interesting book which changes as the book is opened at different angles and stretched or compressed.
Image 10.17
Image 10.18 – the cover
This sort of book would work beautifully as a way of displaying quotes, thoughts or even little sketches on the flags.
For my next book I decided to try a book made from one sheet of folded paper (image 10.19). This was also from ‘Making Handmade Books’ by Alisa Golden. I started by making five incisions in the sheet and then following a folding sequence
Image 10.20
Once the paper was folded into the book shape shown in 10.21 I used some PVA glue to stick the folds together so that it could not unfold. I then decided to decorate the edges with some loops of linen thread as shown in image 10.22 which I felt contrasted well with the rigid edges of the book.
Image 10.22
Image 10.23
My next book was also folded, this time from a long strip of paper.
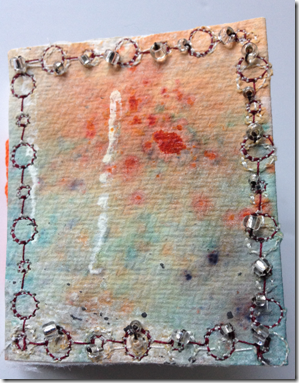
On the cover I used the sewing machine to stitch a zig-zag and then added some metal seed beads in places.
I decided to create a book with a wallet type cover next. First I created a basic book, bound together with thread as shown in image 10.26.
Image 10.26
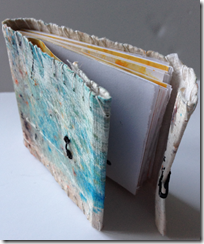
I then made a cover which wrapped around the book, and used PVA glue to stick it in place. I stitched on a black hook and eye to act as a fastener.
Image 10.27
Image 10.28
I gave the book a very simple edge of white linen stitches.
Image 10.29
My final book was a combination of folding and pamphlets. I created a concertina and added pages into the folds as shown in image 10.30. The pages were stitched in place through the spine of each fold.
I decorated the cover with a pre-set machine embroidery stitch and then added glass beads on top.
Image 10.31
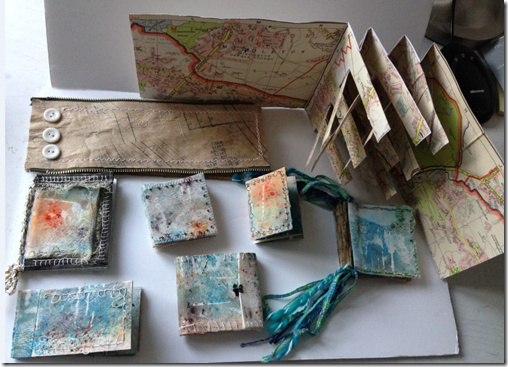
I really enjoyed these chapters and could have continued making more and more books, but felt that I had got a taste of the different types of structures that I might want to use for my final assessed sample.
Image 10.33 – my collection of book-like structures


